As my time management has not been strong the past couple of weeks (I have had a lot of work commitments), realistically I doubt I will be able to make the costume that I envision in my head. Instead I am going to focus on just the hat and the coat, as I feel these two items are an essential part of the costume and will be easy to make in the two weeks I have left to complete this project. In a way I am excited for this event to be over, I feel I have lost momentum with the project in terms of research and I am looking forward to moving on to more abstract costumes and ways of working.
I constantly come back to repurposing found things within my work. I have sourced a top hat and an old costume tails coat that I intend to rework and reshape. I think I am drawn to finding things and reworking them partially because there is something quite infantile and childlike about making in this way and partially because of the growing demise of our environment recycling is very important to me. If I can reuse anything in anyway I will.


In keeping with the Neo-Victorian vibe of steampunk fashion I knew I wanted a tails coat and a top hat with a plasma ball on top. I was deliberating with the idea of embedding the plasma ball into the hat so that just the orb was sticking out or simply sticking it on top. After speaking to the 3D technicians we decided it would be far simpler and more practical to glue the ball on to the top of the hat using super strong epoxy resin glue that is designed for holding glass and metals together (it will never move once its set!) . The plasma ball itself had to be battery operated as no mains electricity would be running to my head during the course of the event. The convenient thing about this particular plasma ball - apart from its little size so it wont overbalance the hat and fall off - is that you can recharge the batteries inside using a USB port charger. This means that I can glue the entire base of the ball onto the hat without having to worry about how I will get it off to change the batteries. What I didn't want was for the hat to sink when weight was put on top, so I reinforced the top with a thin piece of MDF (3mm I think) and the epoxy resin glue to keep the integral structure of the hat.
What is also cool about this plasma ball is that it reacts to sound if you are close enough to a speaker. The 'plasma' actually moves in time to the music!!! I hope that this happens whilst at the event as there will be bands playing. Although I think I will have to get really really close to the speaker and there may be too much background noise for it to work.

After attaching the plasma ball to the hat I realised that it was going to need something else as it looked very boring with just the black base. Around this time I spoke to fellow student Maisie who gave me more ideas about what steampunk fashion actually entailed. Gears and cogs like the inside of clocks or steam engines are a frequent addition to most steampunk garments and are very stereotypical of the aesthetic. Whilst you can buy a magnitude of these cogs for very cheap off amazon I wanted as much as possible to be handmade. I began with researching steampunk gears as I believe they are different to the ones we see today that are more functional.
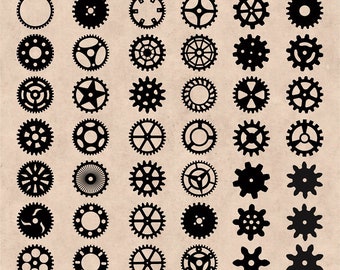
I started out cutting different types of these cogs using balsa wood, but soon found that because of the grain of the wood it was difficult to get the curved edges and detail I wanted and a lot of them ended up snapping. I then moved on to thin grey card which was easier to get detail but harder to cut with the knife as it ended up going a bit 'fluffy' because not all the layers of the card had been cut. Finally I used paper plates (just because I had some handy) and these worked really well as the reinforced paper was easy to manipulate so I could get lots of the details of the gears. Once I had enough to cover the base of the plasma ball I spray painted them bronze so that they looked more metal-like. I had wanted to use Rub and Buff - a substance Maisie told me about that makes materials look like rusted metal - but I couldn't find it anywhere in Norwich and I am not a fan of buying things online unless I really have to. Whilst this is probably not a good way to source materials I know I prefer working with materials and processes that I have actually been able to see and pick up. You can never fully trust what you get online! If I had had more time I probably would have ordered some Rub and Buff as I think the metallic effect would have worked better and added to the detail of the hat. What I liked about using different materials for the gears though is that when they were spray painted they have different surfaces. The grey card absorbed the paint to have a matt effect yet the paper plates remained shiny.
 |
| Balsa Wood and Grey Card |


I think the goggles (which I had already) help to bring the aesthetic together. If I had more time I would add more cogs and gears to almost overwhelm the plasma ball, however it is difficult to completely cover the base as I had to leave space for the USB to plug in.
THE COAT


I found this coat in a charity shop for £6!!!??? I am assuming its previous use was for a ringmaster costume or something similar as the quality of the material is not that good. However, it was perfect for what I needed! The steampunk costumes I have been looking at have always been dark colours, and even the cybergoth costumes only have little bits of neon colour, so I knew I wanted to cover the coat in some way. I had an old black suede fringe jacket that I never wore and decided that covering the tails coat in this suede fabric would be interesting and would give it a misshapen look as well as a more interesting texture.
As the costume develops I have begun thinking about what I will wear underneath the coat. I want the overall aesthetic of the 'character' I am creating to look as though they have been caught between worlds because of their extensive time travelling. I think by stitching fabric onto the tails coat instead of creating a pattern and making my own coat will adhere to the 'inventiveness' of steampunk ideas and also help to make it look like my jacket got caught in the cross between times - it got destroyed so I have had to stitch it back together. This is also why I chose to use cream thread instead of black thread to stitch on the suede, although in hindsight black thread probably would have looked better and had the same effect.
 |
| Painting with UV paint |
Because essentially I have been stitching two completely different jackets together, they didn't match up completely, leaving gaps where the red of the tails coat could be seen. I also realised that I may not have enough black material to cover the entirety of the tails coat. I went fabric shopping and found some purple metallic fabric - which reminded me of Zorg's costumes in The Fifth Element (Which I watched for research recently) - and decided that the tails and the arms would be this fabric instead of the suede. The two fabrics contrast quite nicely and add to the past meets future aesthetic.
I have been thinking over the week about how I could incorporate a futuristic aspect into the coat; as the tails and the black represent the past, I feel I need to add a futuristic element in order to make it look like it had been to the future and back. Lights are a very important part of technology and in our current age all sorts of lights are easily accessible. I had originally thought about the idea of using LED strip lights but again I would have to order these online and due to the time restrictions I did not want to risk them coming and not working. So instead I experimented with UV paint.
Looking back the UV paint was just as much of a risk as buying the LEDs as I don't actually own any blacklight to test whether the paint will actually work. I pictured a blue stripe around the jacket - sort of 'Tron' style - and I painted over the stitching with blue UV paint. The paint was messy and created an uneven and unclean line which was not what I was going for; plus there was the uncertainty as to whether it would even work.
 |
| Tron: Legacy Movie picture |


That was when I found 'make your own neon effect sign'! 3m of very blue very neon lighting all battery operated and easily manipulated as it didn't come pre-wired. Because of the big stitching on the jacket I was easily able to loop the neon through the stitching all the way round the collar of the jacket and back down again make it light up all the way around. Had I had more time and found this neon sign kit earlier I would have only used neon tubing in the jacket instead of the UV as it is much more effective and less of a risk.
Overall I think I ran out of time on the jacket, I needed to have it done by today (18th) as I have work commitments tomorrow and then the event is on Saturday, but again this is due to my poor time management and also my waining interest in the project because I am keen to start something new.
If I started this earlier there would have been more time for experimentation and I think I would have been more pleased with the outcome, however in a way I have been continuing to think through my making and learning as I go, which is a process I always enjoy.
In my original drawing I had a harness type belt. I picture it being black leather originally but then adding lights to make it compliment the plasma ball and to add another light up layer to the costume. I have definitely run out of time for this but perhaps it is something I will continue to explore after the event. Underneath the jacket I need layers because it is going to be cold so I am thinking of wearing a neon dress with the belt and a black mesh top underneath. The suede on the jacket should give me some extra warmth too as it has definitely weighted the fabric.
My hope for the event is that people interact with the plasma ball. If I can get the audience to engage with the costume then I feel I will have succeeded.

No comments:
Post a Comment